Cakewalk // Documentation // CakewalkSonar // Using Melodyne
Table of Contents Previous Next Index

Using Region FXMelodyne ► Using Melodyne

1.
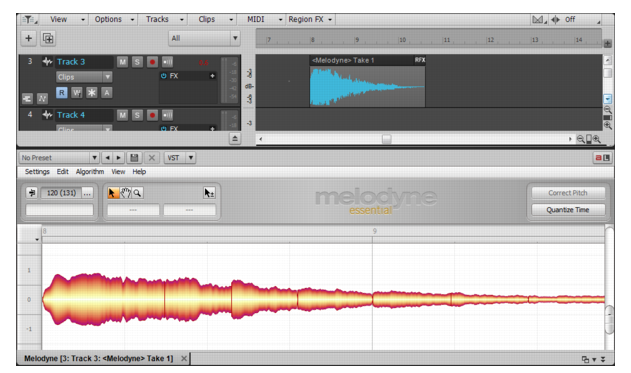
Select an audio region or clip you wish to process with Melodyne. To select a region on the timeline, use the Smart tool or Select tool and drag across the bottom part of the clip(s). To select an entire clip, simply click the clip. For details, see Selecting clips.
2.
Do one of the following:
*
In the Track view, click the Region FX menu, point to Melodyne, then select Create Region FX.
*
Right-click the Region FX clip, and select Region FX > Melodyne > Open Editor.
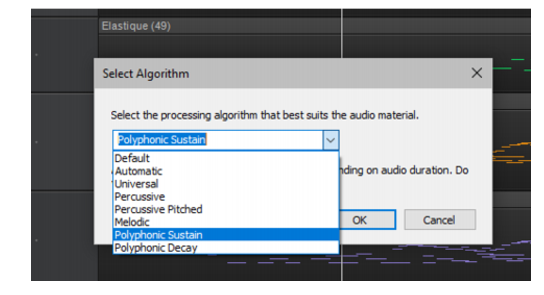
When you create a Melodyne Region FX clip, Melodyne analyses the audio data to determine the best algorithm to use for displaying and playing back the audio. You can change the algorithm at any time from Melodyne’s Algorithm menu. In some cases, you may want to change the algorithm if the audio material was not interpreted in a way that suits your editing needs. The options are as follows:
*
Melodic. Use for monophonic melodic material (only one note is ever sounding at any given instant). For best results, use a dry audio source without reverb.
*
Percussive. Use with rhythmic, atmospheric and noise-based material, or any other material in which Melodyne cannot detect any clear pitch in the sounds.
*
Polyphonic (Melodyne editor only). Use with single-instrument polyphonic material. In Melodyne assistant and essential, polyphonic material is assigned to the Percussive algorithm.
Note: Polyphonic editing is only available in Melodyne editor with the patented DNA Direct Note Access technology. In Melodyne assistant and essential, the algorithm for polyphonic material is present but disabled in the Algorithm menu. This is because you can still open and play back projects that were created with Melodyne editor and contain polyphonic material, and in such cases, Melodyne automatically selects the polyphonic algorithm. However, Melodyne assistant and Melodyne essential do not allow you to edit polyphonic material, or select the polyphonic algorithm manually.
*
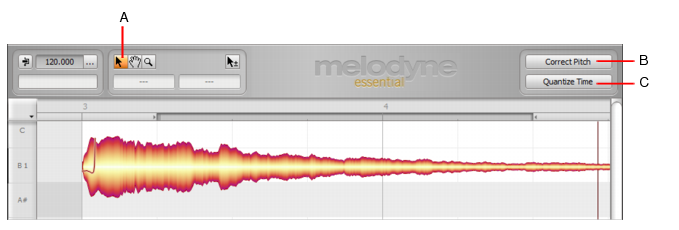
Main tool. Use the Main tool to fine-tune individual notes. For details, see To modify pitch and timing with the Main tool.
*
Macros. Use macros to automatically edit the selected notes. For details, see To correct pitch automatically by macro and To correct timing automatically by macro.
A. Main tool B. Correct Pitch macro C. Quantize Time macro
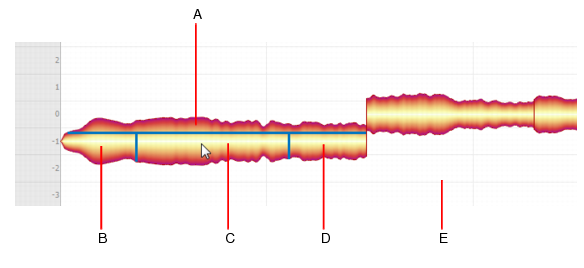
Melodyne's Main tool is similar to Sonar's Smart tool in that it is context-sensitive and has different functions depending upon its position relative to a note.
Similar to a clip in Sonar, each note (or “blob”) in Melodyne has several hotspots that you can click to modify the blob. To display these hotspots, select View > Show Blob Info in Melodyne. Melodyne now displays thin lines to identify the various hotspots when you point to a blob. Each blob has a front, center, back, and upper hotspot. The mouse pointer indicates the function of each hotspot.
Tip: To make two adjacent notes completely independent, cut one of the notes, then paste it right back again.
4.
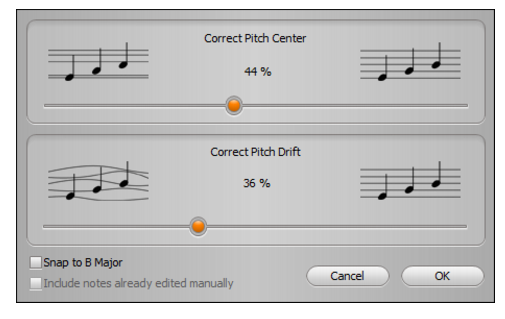
Click the Correct Pitch button to open the macro controls.
5.
Adjust the Correct Pitch Center slider to apply a degree of correction ranging from 0% (no correction) and 100% to the pitch center of the selected note(s).
Note: By default, notes are moved towards the nearest semitone. To snap to the detected scale, select the Snap to <name of scale> check box. When enabled, any notes outside of the scale are ignored.
6.
Adjust the Correct Pitch Drift slider to progressively reduce the amount of pitch drift exhibited by the selected note(s).
7.
Click OK when you are satisfied with the results.
3.
On Melodyne’s View menu, select Show Intended Notes. The Melodyne editing area now shows the actual starting position of each note, along with a gray frame that indicates the intended starting position.
5.
Click the Quantize Time button to open the macro controls.
6.
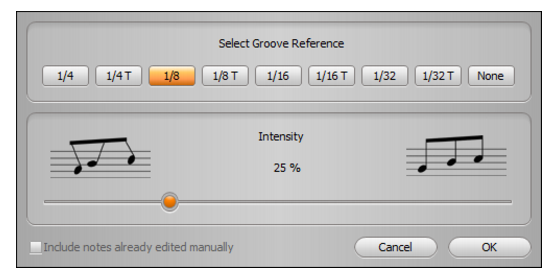
Under Select Groove Reference, select the note duration that will govern the time correction.
7.
Adjust the Intensity slider to apply a degree of correction ranging from 0% (no correction) and 100% to end up precisely on the beat.
8.
Click OK when you are satisfied with the results.
1.
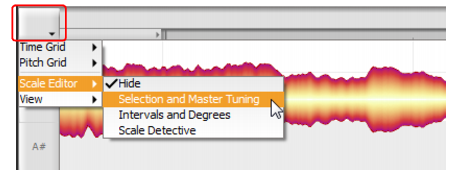
Click the small arrow button above the pitch ruler and select Selection and Master Tuning on the pop-up menu. Two new columns appear in the pitch ruler. The first (narrow) column lets you adjust the master tuning, and the second (wide) column shows the scale ruler.
Do one of the following:
*
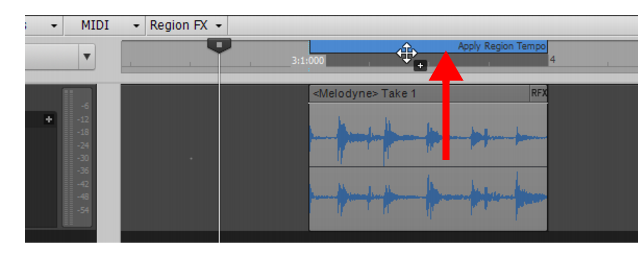
Select the Melodyne Region FX clip, then select Region FX > Melodyne > Follow Host Tempo on the Track view menu.
*
Right-click the Melodyne Region FX clip and select Region FX > Melodyne > Follow Host Tempo on the pop-up menu.
Note: You cannot slip-stretch a Melodyne Region FX clip when the Follow Host Tempo option is enabled.
Figure 485. The Melodyne Tempo Options button pulses if there are any tempo inconsistencies.
*
Click the Tempo Options button in Melodyne, then select Use the tempo grid detected by Melodyne.
Do one of the following:
*
Select the Melodyne Region FX clip, then select Region FX > Melodyne > Copy MIDI Events on the Track view menu. You can then paste the data to a MIDI or instrument track.
*
Right-click the Melodyne Region FX clip and select Region FX > Melodyne > Copy MIDI Events on the pop-up menu. You can then paste the data to a MIDI or instrument track.
Do one of the following:
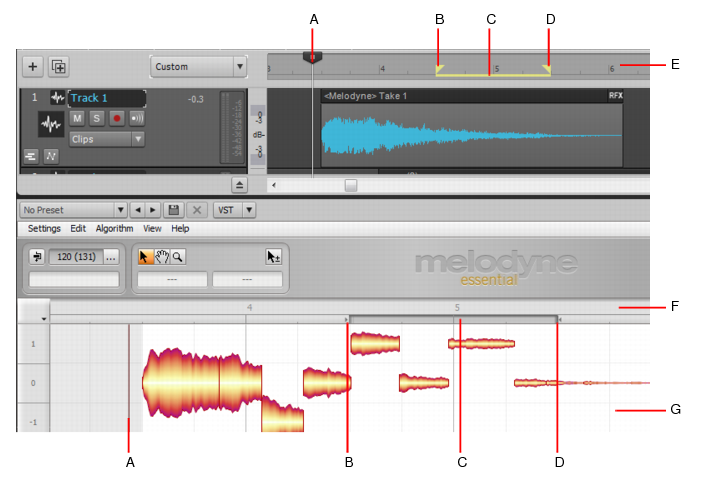
A. Now time B. Loop start (drag to adjust) C. Loop region (drag to move; double-click in Melodyne to enable/disable looping) D. Loop end (drag to adjust) E. Sonar Time Ruler F. Melodyne Time Ruler (click to change Now time, double-click in the upper half to start/stop playback) G. Double-click empty background to start/stop playback
Copyright © 2024 Cakewalk, Inc. All rights reserved
Sitemap | Privacy Policy | Legal