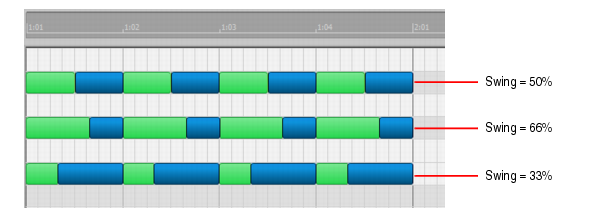
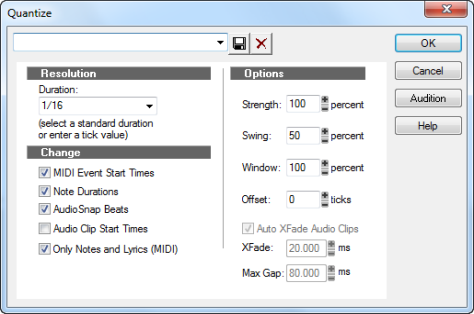
The Process > Quantize command adjusts the start time and duration of selected notes so that they line up with a fixed size grid.
The resolution indicates the spacing of the grid. You can use any value from a whole note down to a thirty-second note triplet. You can also specify resolution in clock ticks. A rule of thumb is to select a resolution that matches the smallest note in the region you are quantizing. If you are quantizing a run of sixteenth notes, use a sixteenth note as the resolution. If you are quantizing a mix of sixteenth and eighth notes, you should still use a sixteenth note. At the default timebase of 480 PPQ, 480 clock ticks is equal to quarter-note resolution.
The human ear is tuned to the slight “imperfections” we hear from most musicians. If you quantize a project so that all notes are perfectly in position, it may end up sounding mechanical or rigid. To avoid this, Music Creator lets you adjust the strength of the adjustment. A strength of 100 percent indicates that all notes are moved so that they are in perfect time, while a strength of 50 percent means that all notes are moved half-way towards the desired position. This lets you “tighten up” the timing as much as you want, without going too far.
When you quantize some portion of a project, you might not want to adjust notes that are very far from the grid. The window, or
sensitivity, setting lets you choose how close to the resolution grid a note must be located for quantize to move it.
If you want, you can restrict the types of events that are affected by the Quantize commands to only notes, lyrics, and audio clips. If you choose this option, Music Creator will not modify other events, like controllers.


